
The Gateway is where DME providers submit, view, and edit their organization information during onboarding. This guide covers first-time login, each section of the form, and what changes after you submit.
First time logging in
Use the credentials in your welcome email. After you log in, select View to open the form. The wording at the top of the page may differ from what you see in training materials.
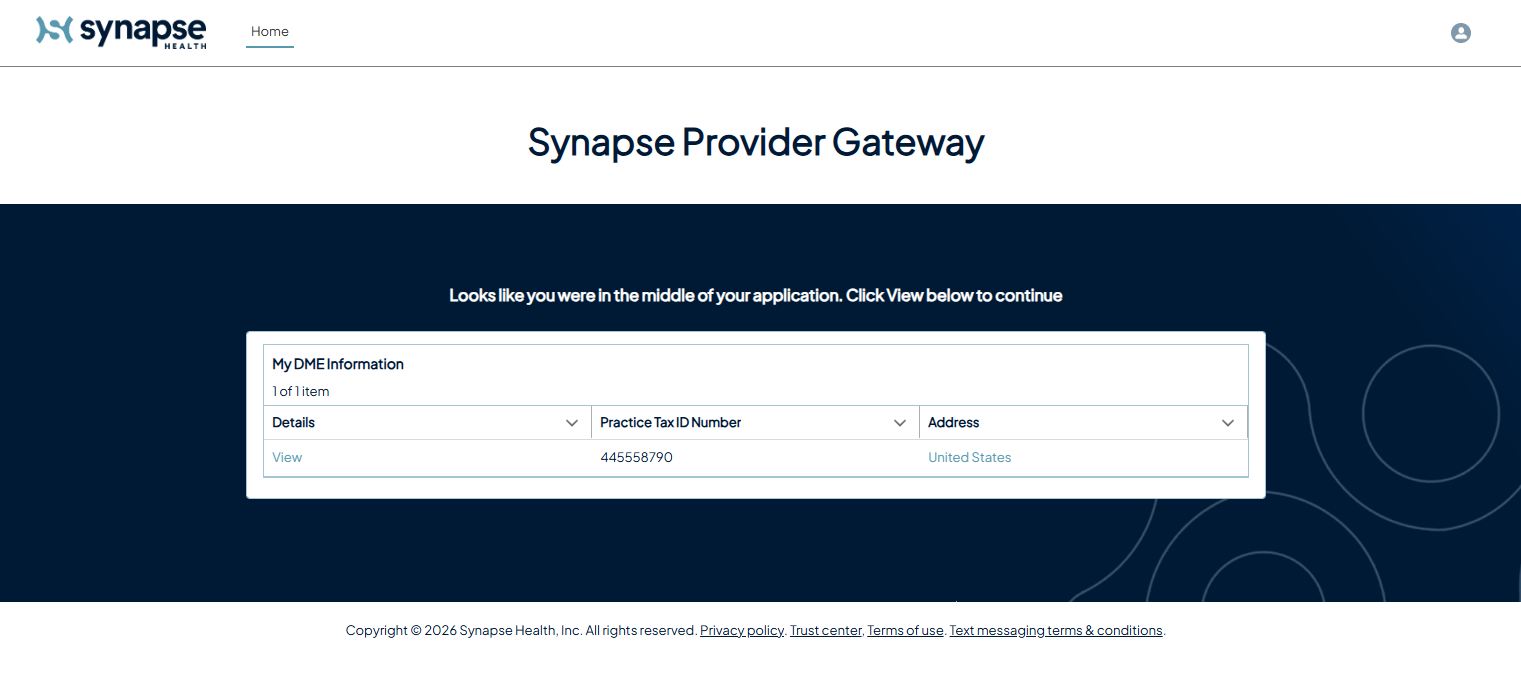
If you update your email address inside the form, your Gateway username stays the same as the one in your welcome email.
Before you start
When you select View, the Gateway lists everything the form will ask for. Gather it before you begin – the form goes much faster with the information in front of you. You will need details for each of these sections:
- Organization information, including NPI and TIN
- Contacts, with one contact per role
- Affiliated entities, if you have any
- Insurance coverage and certificate files
- Each service location, with HCPCS codes, coverage areas, and licenses
- Disclosure answers and attestation
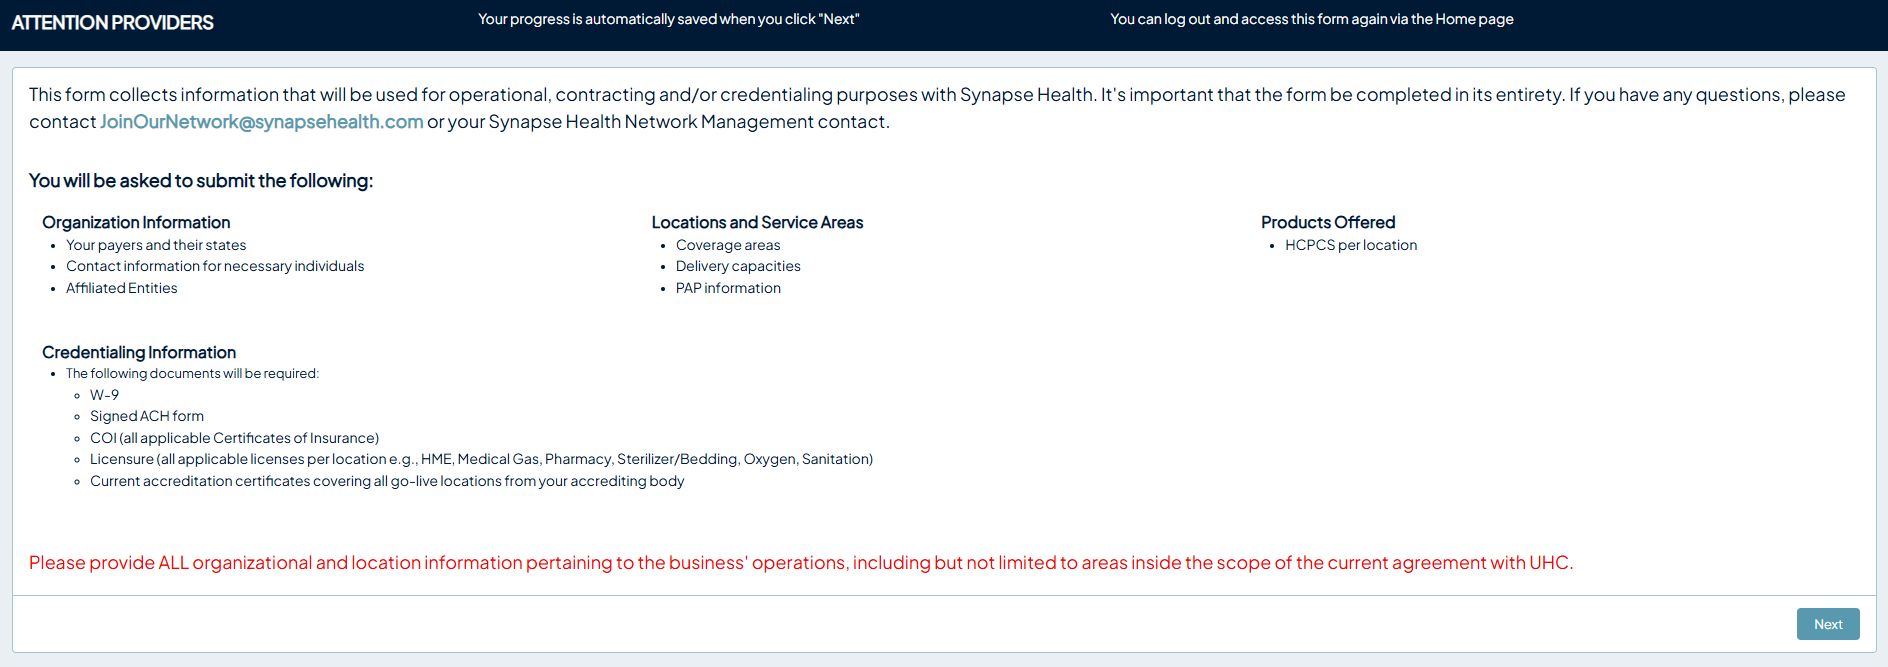
Documents you will need to upload
- W-9
- Signed ACH form
- Certificates of insurance for all applicable coverage
- All applicable licenses per location, for example HME, medical gas, pharmacy, sterilizer, bedding, oxygen, and sanitation
- Current accreditation certificates covering all go-live locations, from your accrediting body
Organization information
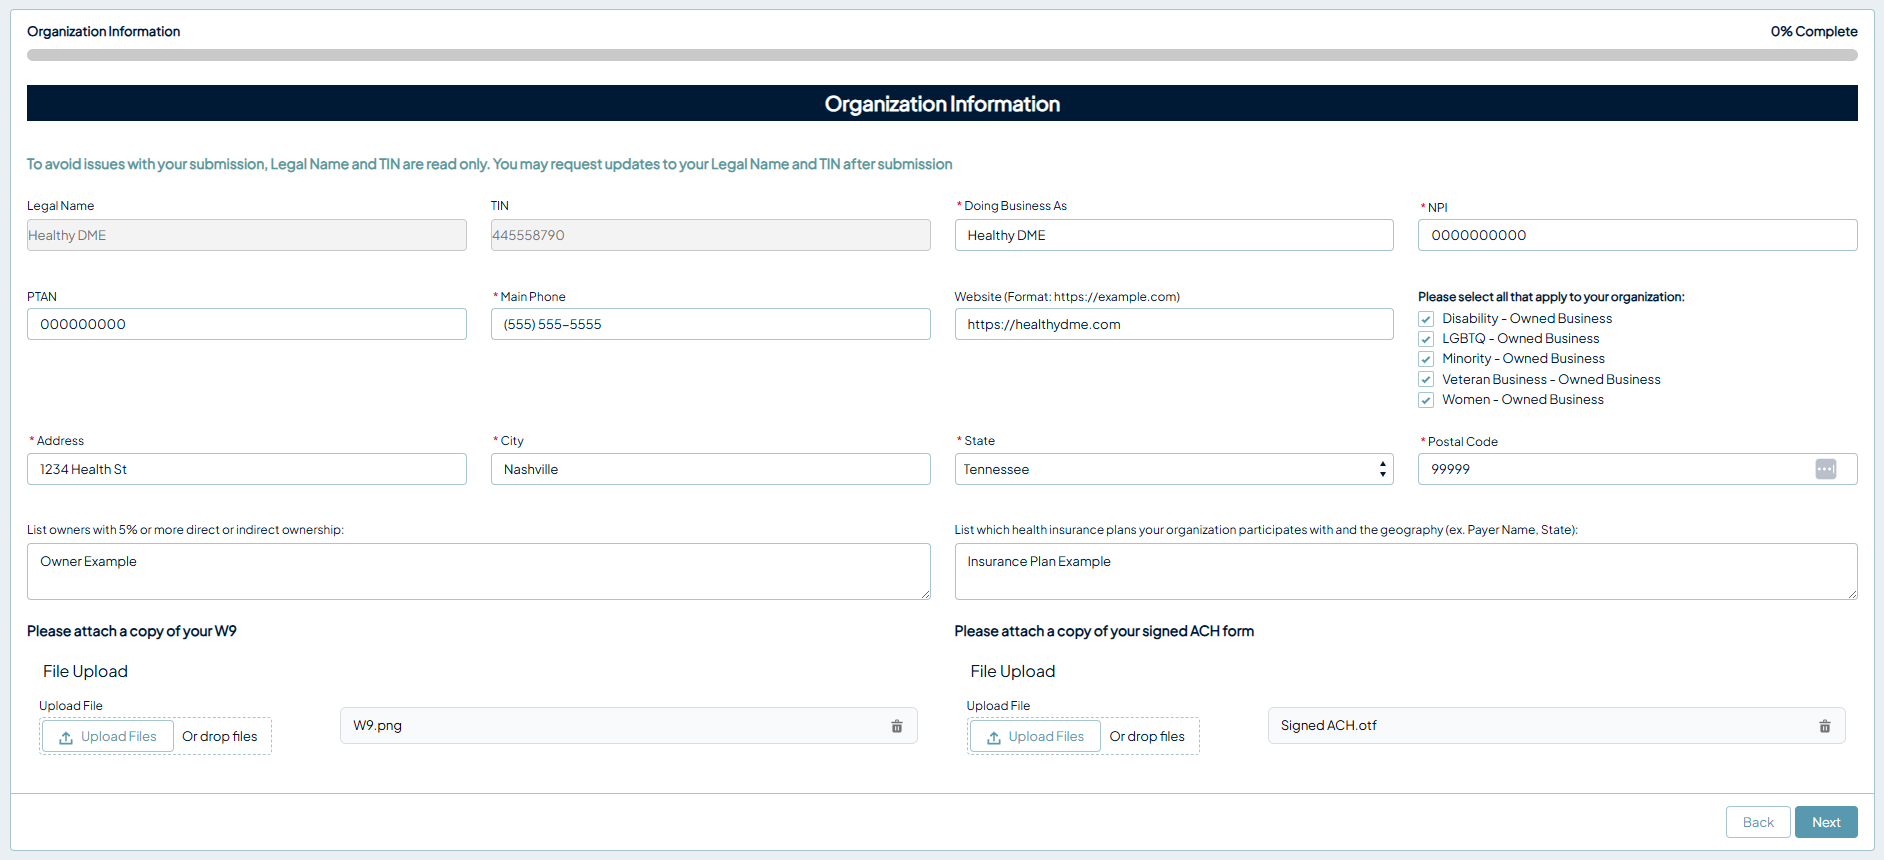
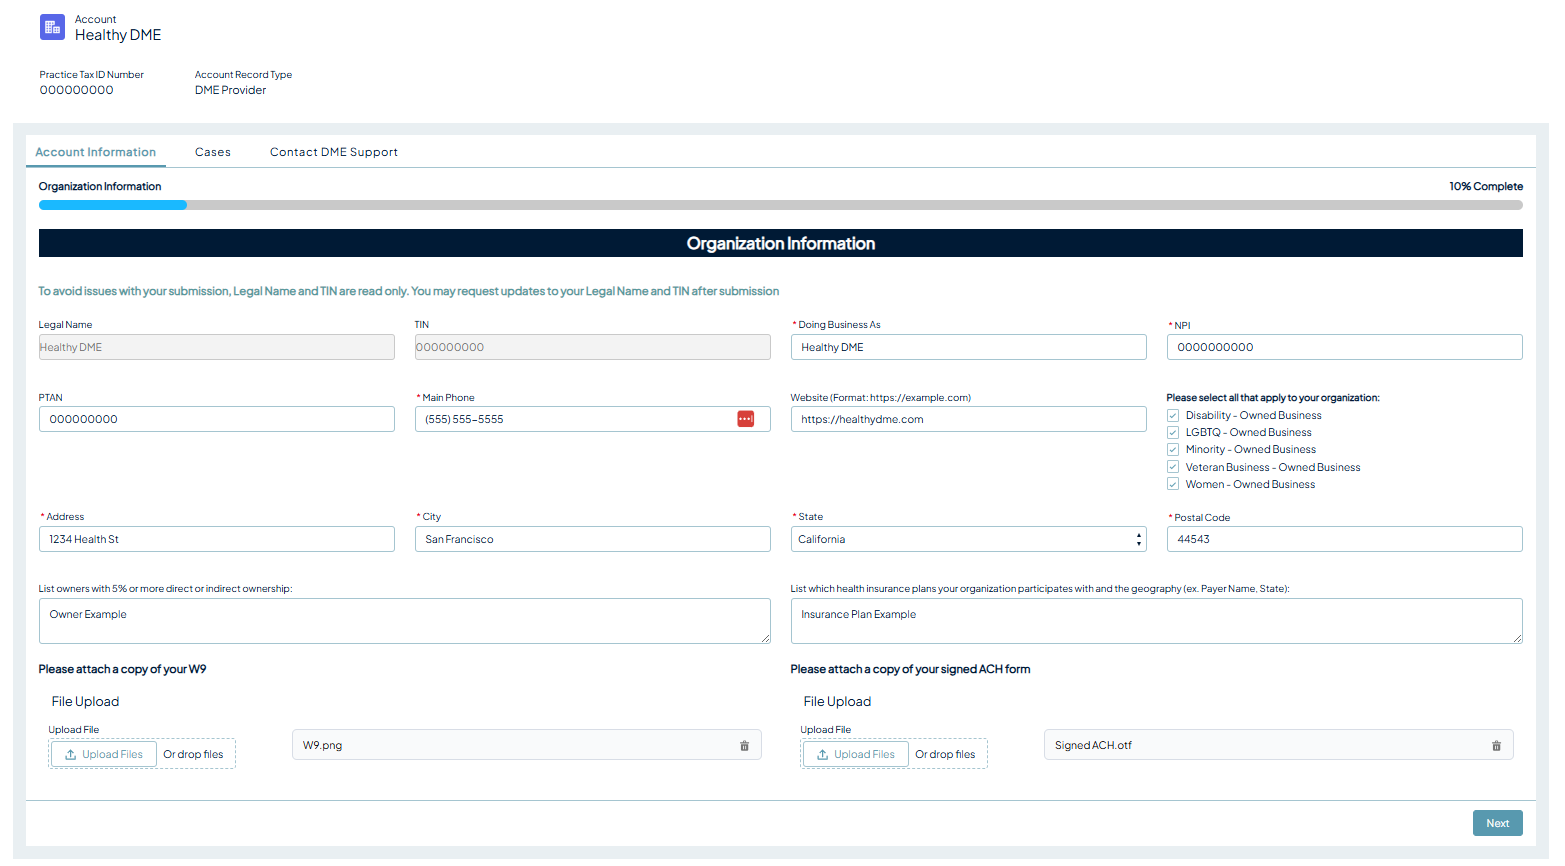
- Your legal name and TIN are already filled in. This prevents mismatches with your submission. You can request a change to either after you submit.
- Field rules apply: NPI must be 10 digits and TIN must be 9 digits.
- If you do not have a DBA, enter your legal name again. This value is used later in the form.
Contacts
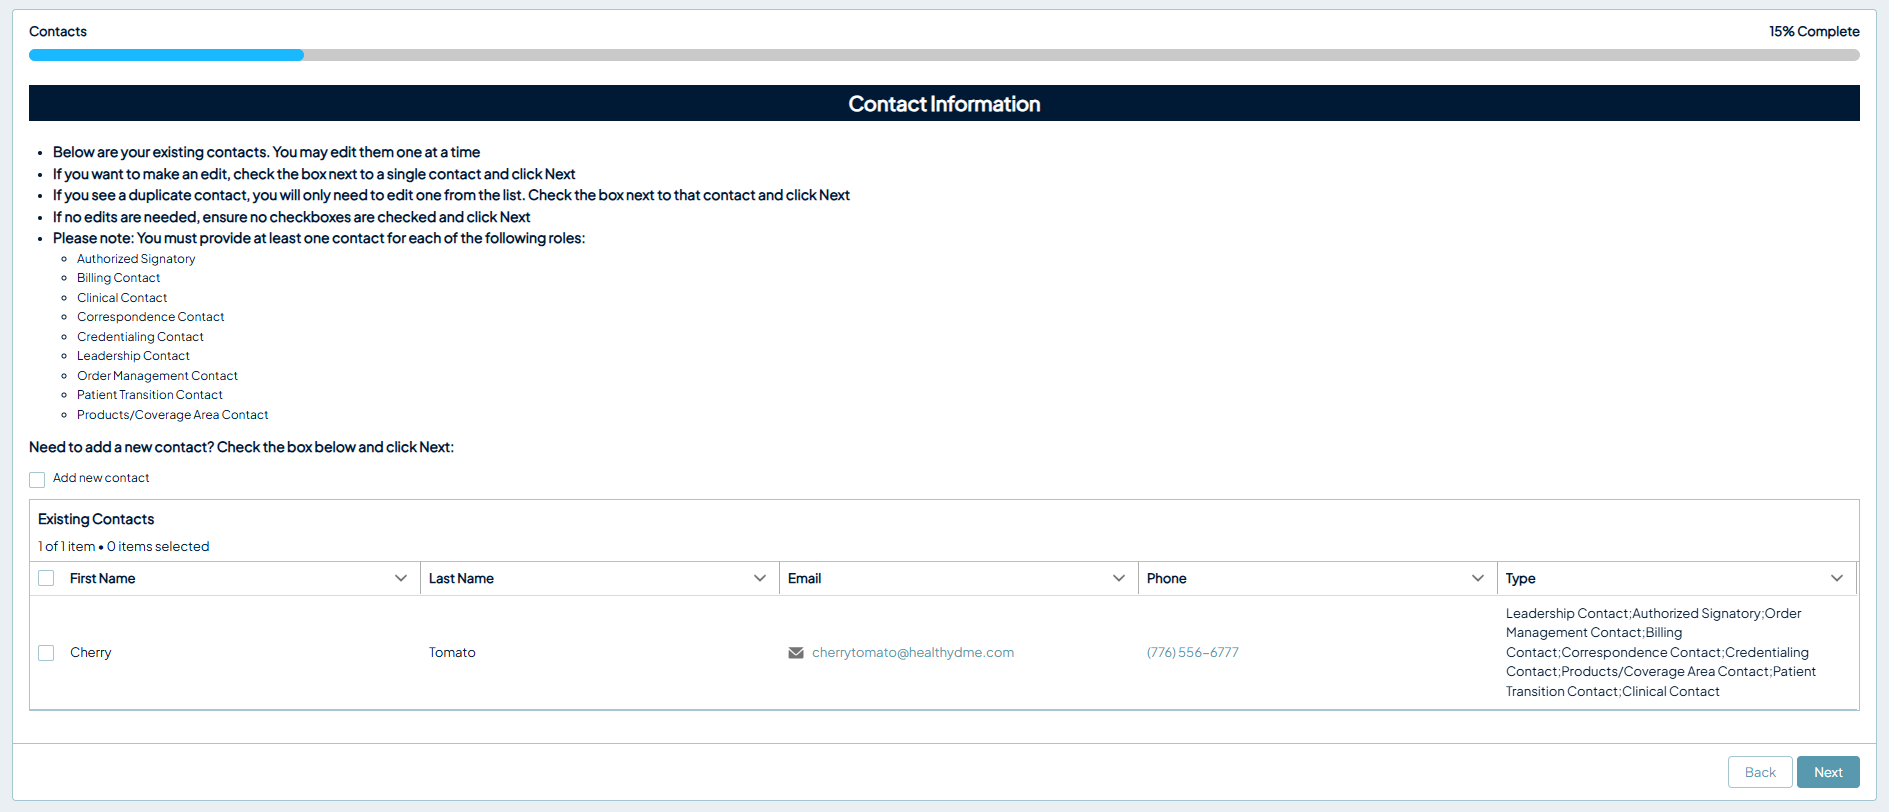
You will see your own contact record and can edit it. Provide a contact for each role.
Two things that trip people up here
- Check only one box at a time – the form lets you select an existing contact and Add new contact together, but it will prioritize editing the existing contact and your new contact will not be added
- Duplicate names are expected – if the same person appears twice, edit only one of the rows. Synapse is working through duplicate records in the system.
Selecting Next without checking any box moves you to the following section.
Affiliated entities
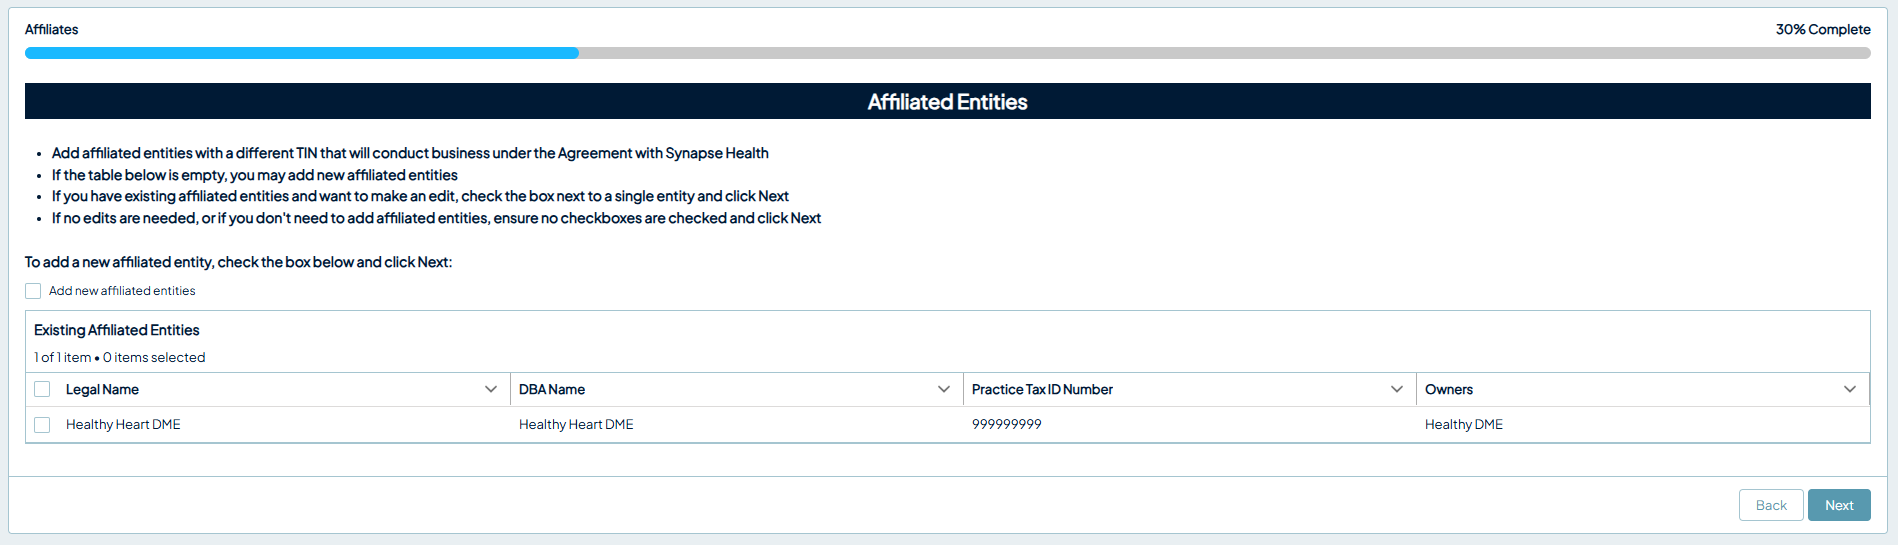
- Affiliated entities are optional. If you have none, leave every checkbox clear and select Next.
- To edit an entity, check the box next to that single entity.
Insurance
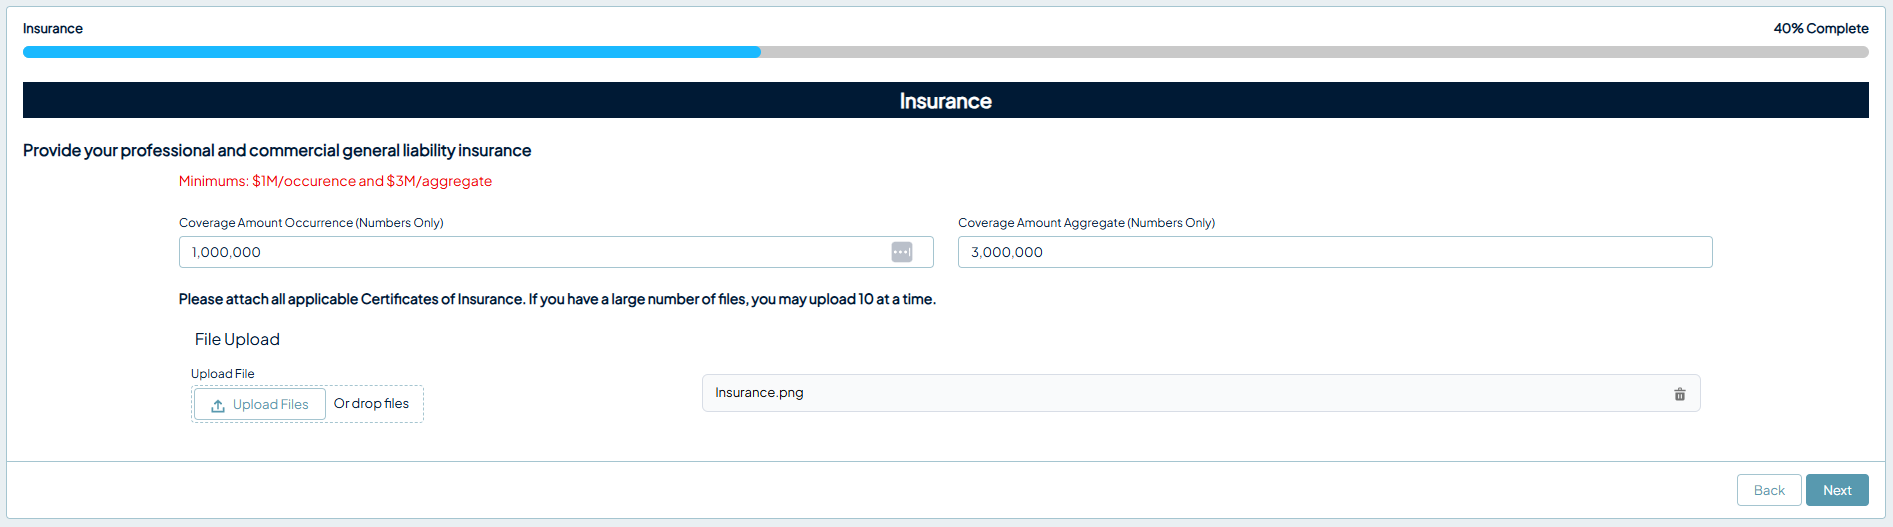
- For coverage occurrence and aggregate amounts, you can type 1m and the form converts it to 1,000,000.
- Upload insurance files in batches of 10 or fewer. Large numbers of files slow the page down.
- You can add more files after you submit. See After you submit below.
Locations, HCPCS, and coverage areas
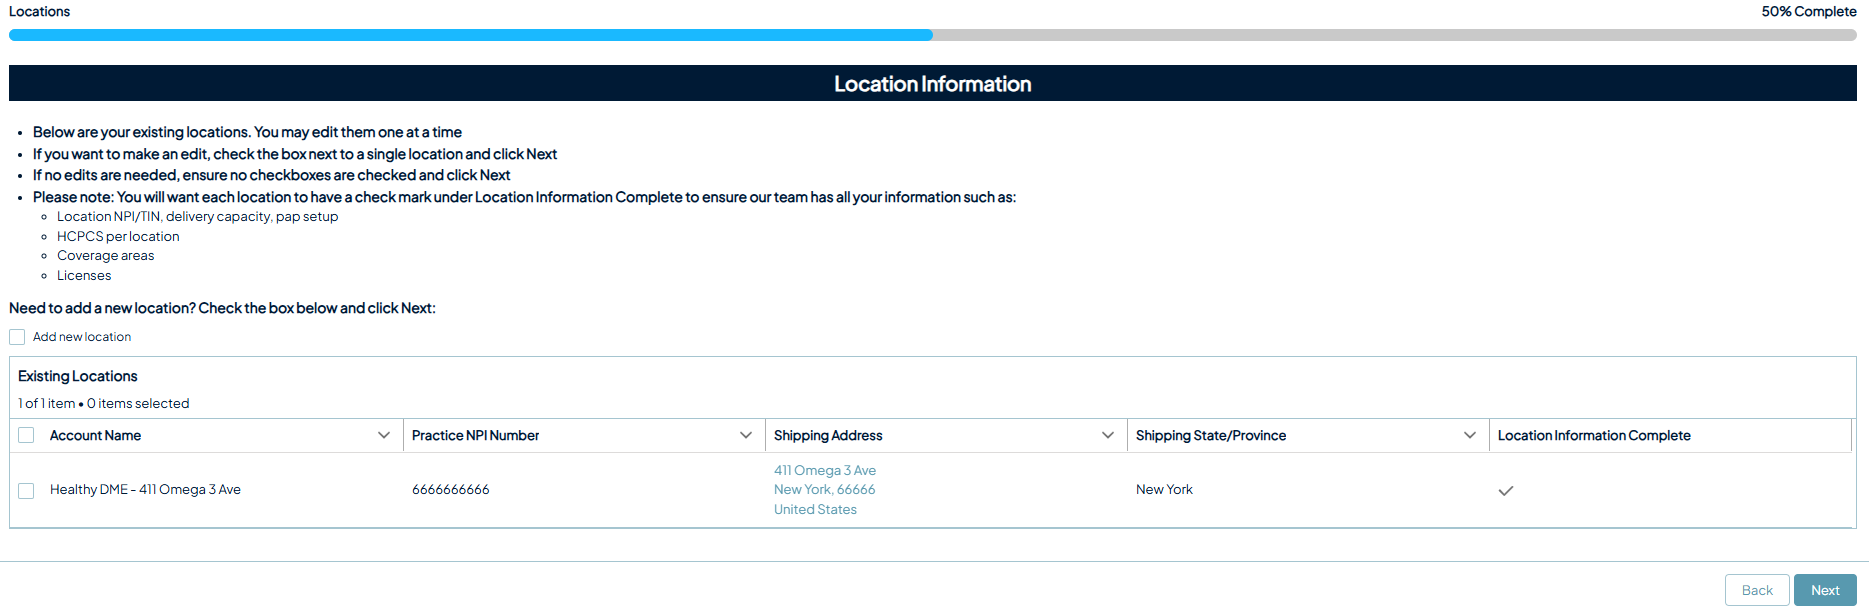
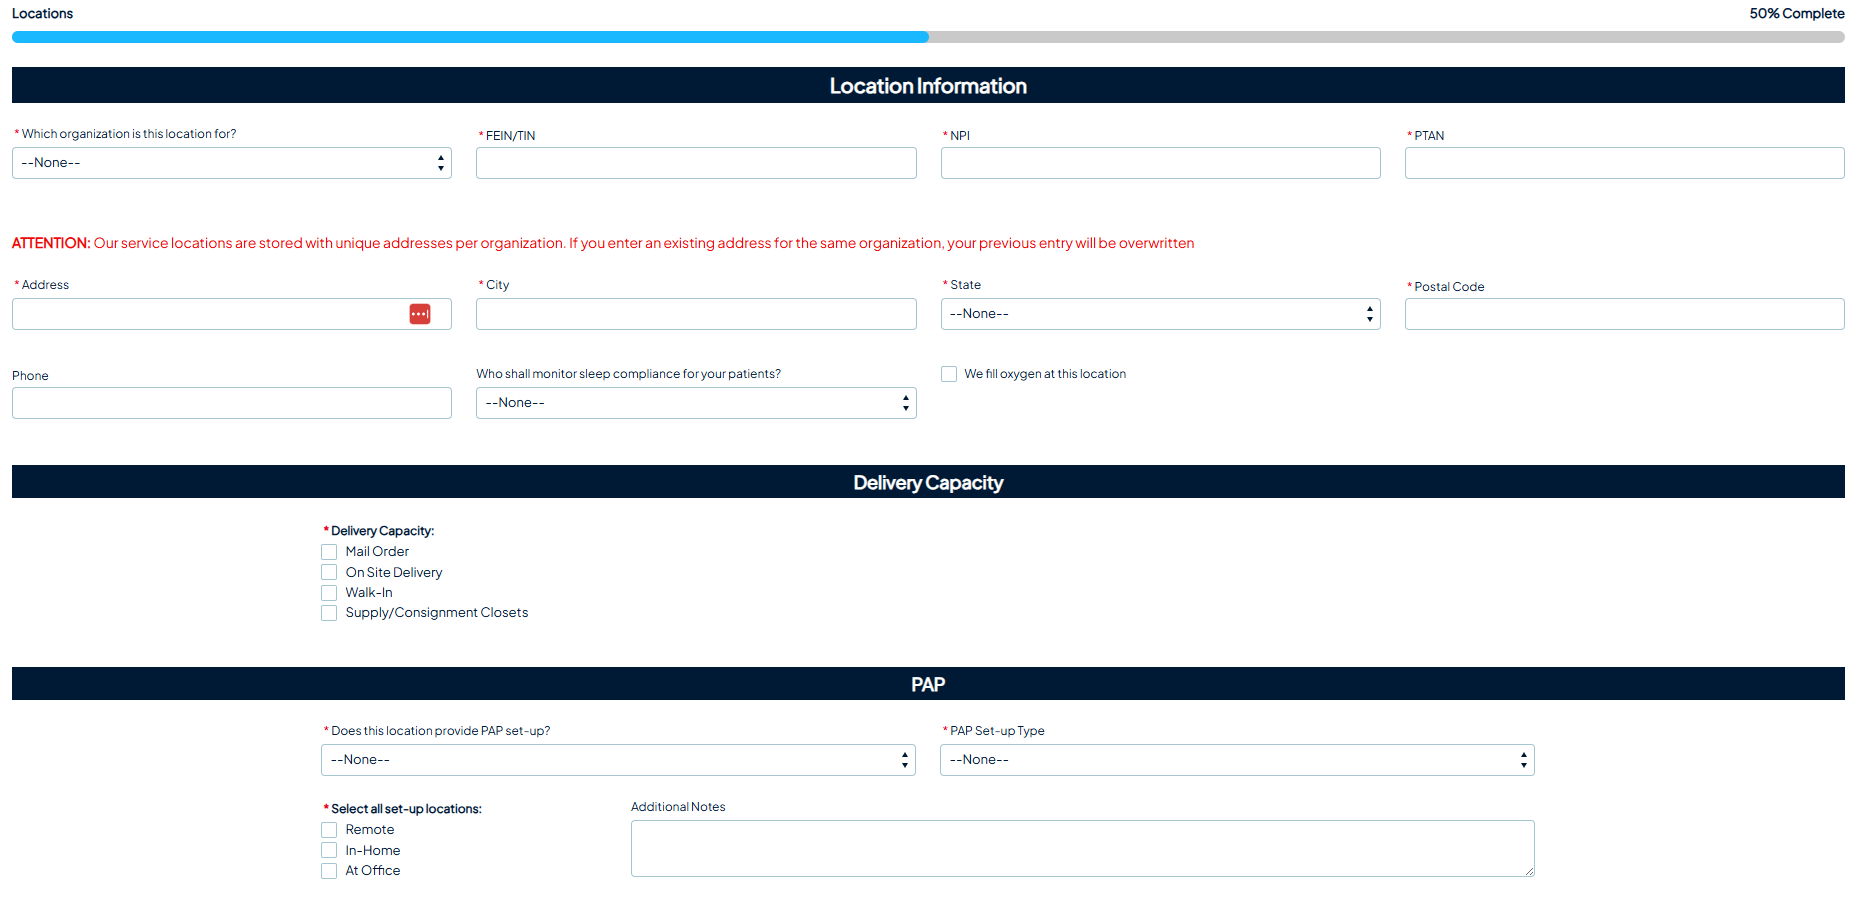
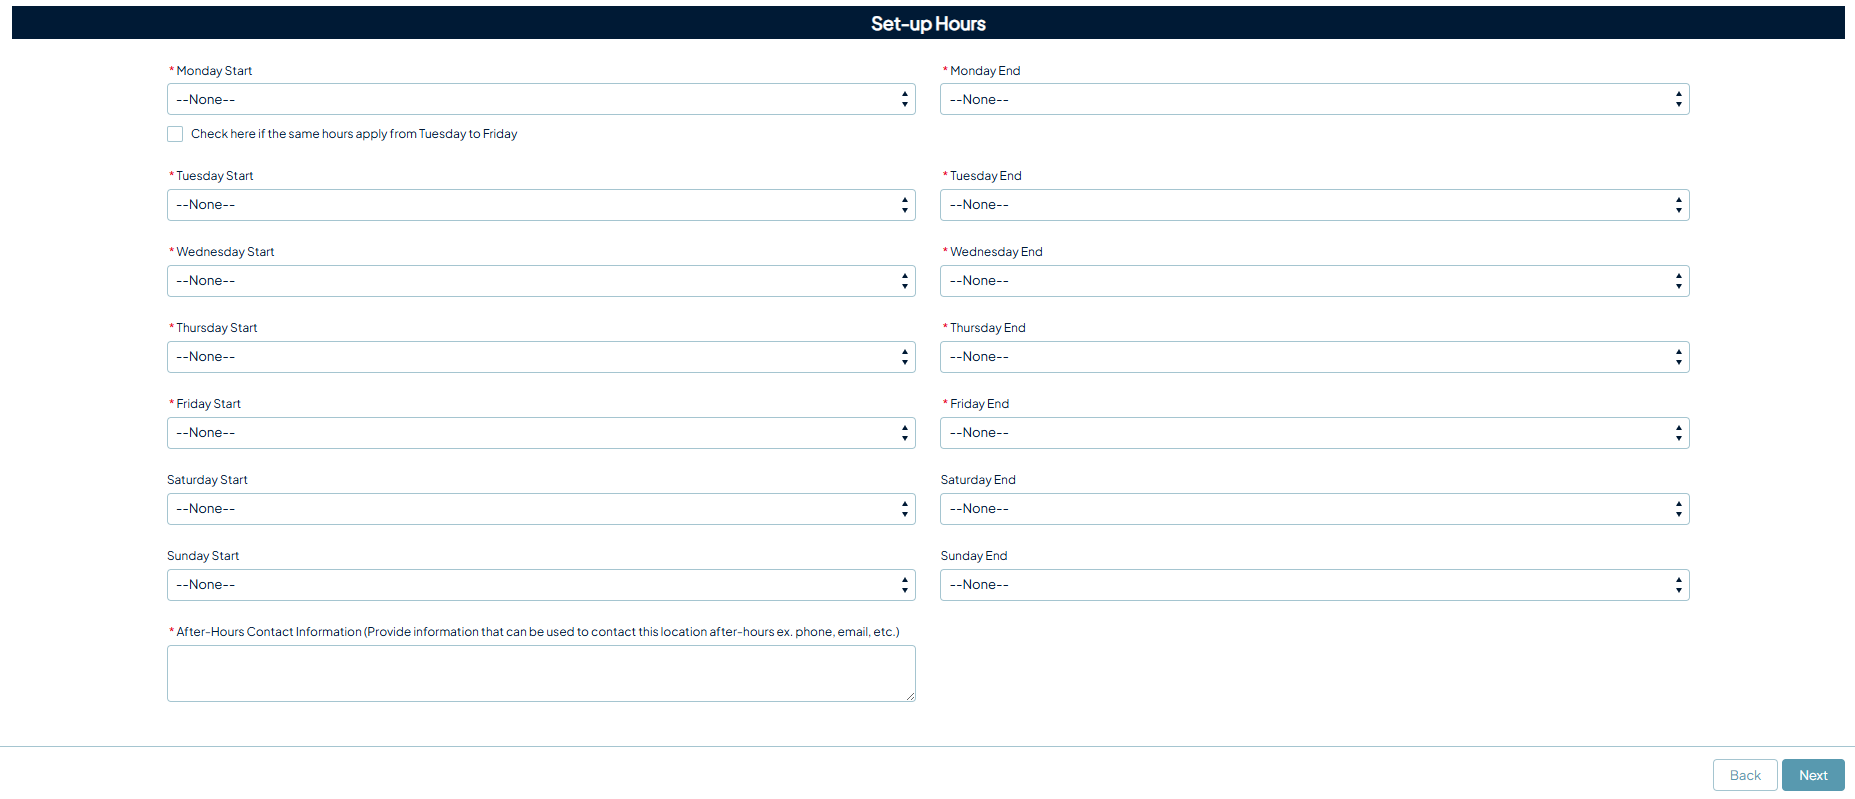
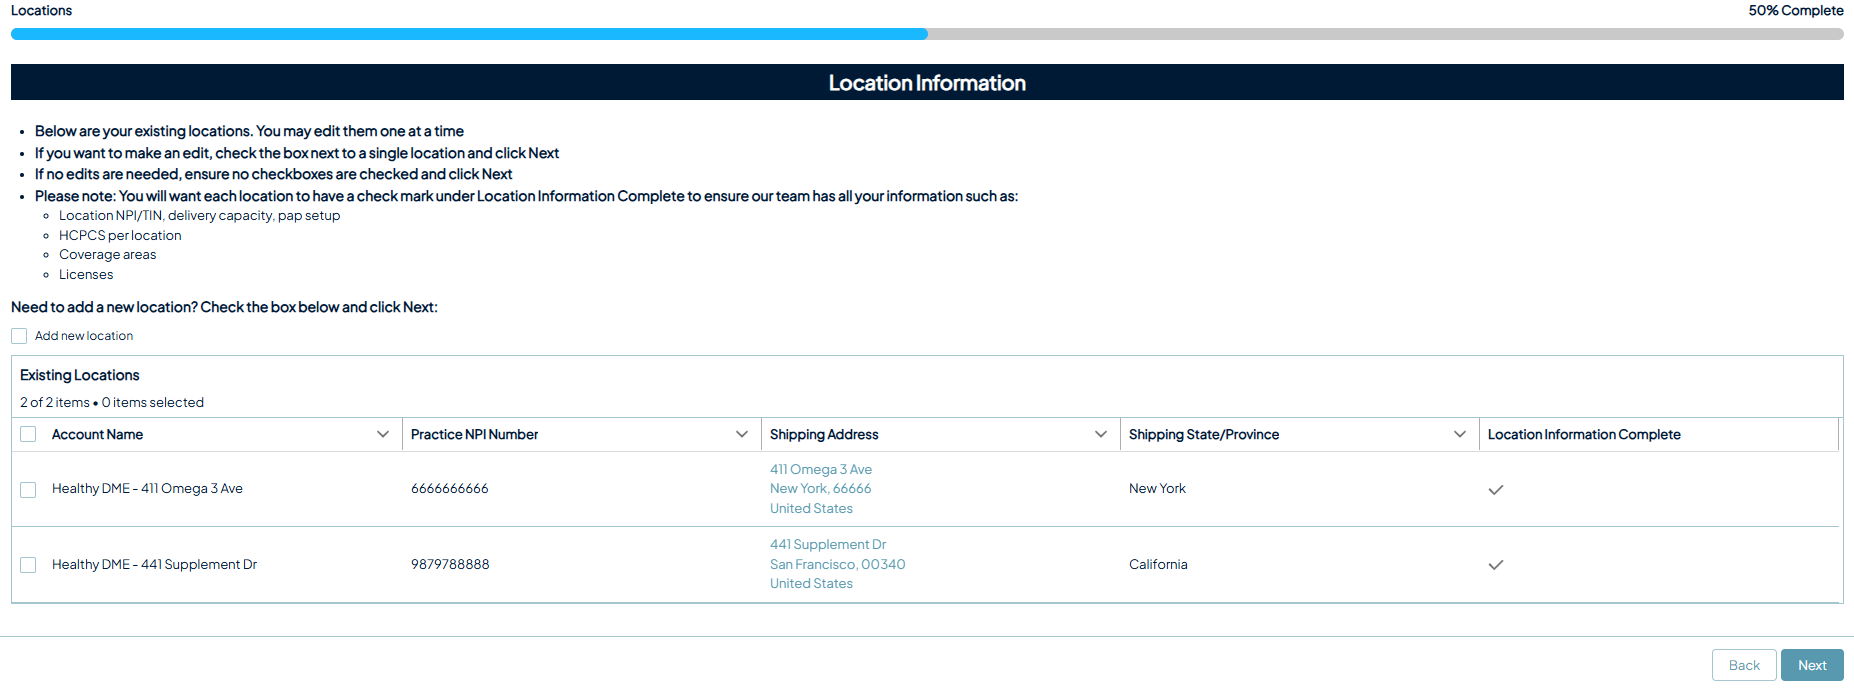
This is the largest part of the form and spans three pages: location information, HCPCS codes, then coverage areas and licenses. If you have submitted locations to Synapse before, you will land on a table of your existing locations. If not, you go straight to the location entry page.
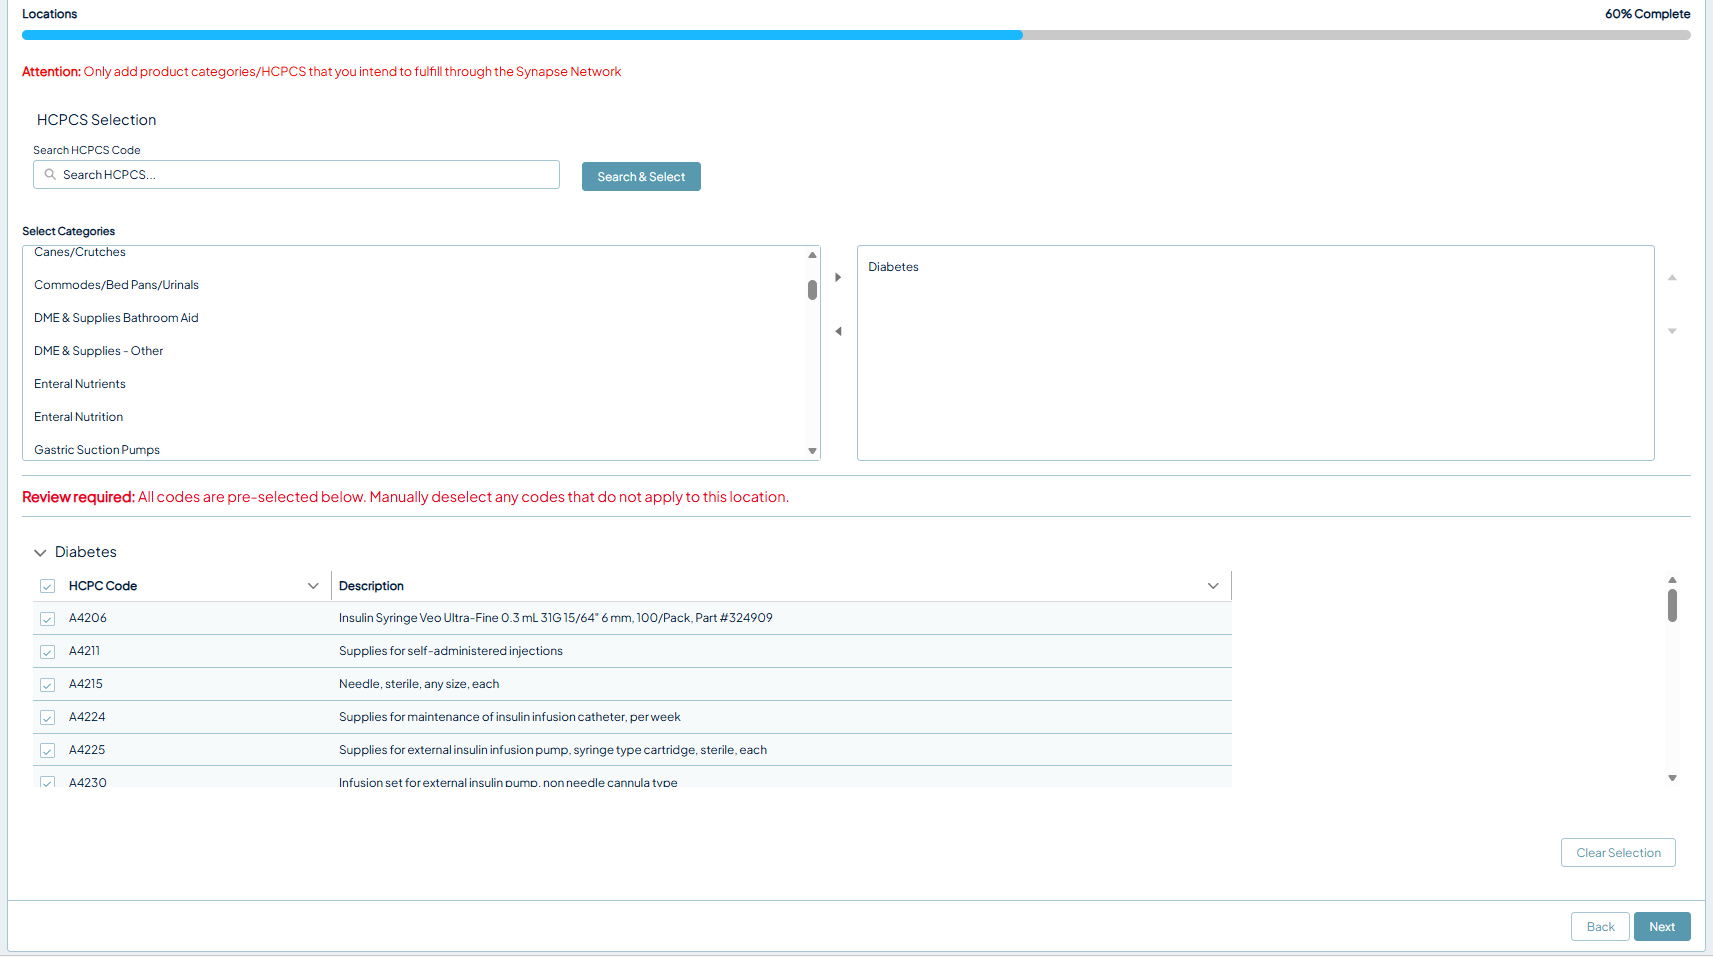
HCPCS codes
- Move your intended categories to the box on the right to see the codes tied to each category.
- Selecting a category automatically selects every code in it. Uncheck the codes that do not apply to that location.
- If you add several locations in one session, you can apply the codes you already selected to each location. If you leave the form and return later, you have to select codes again.
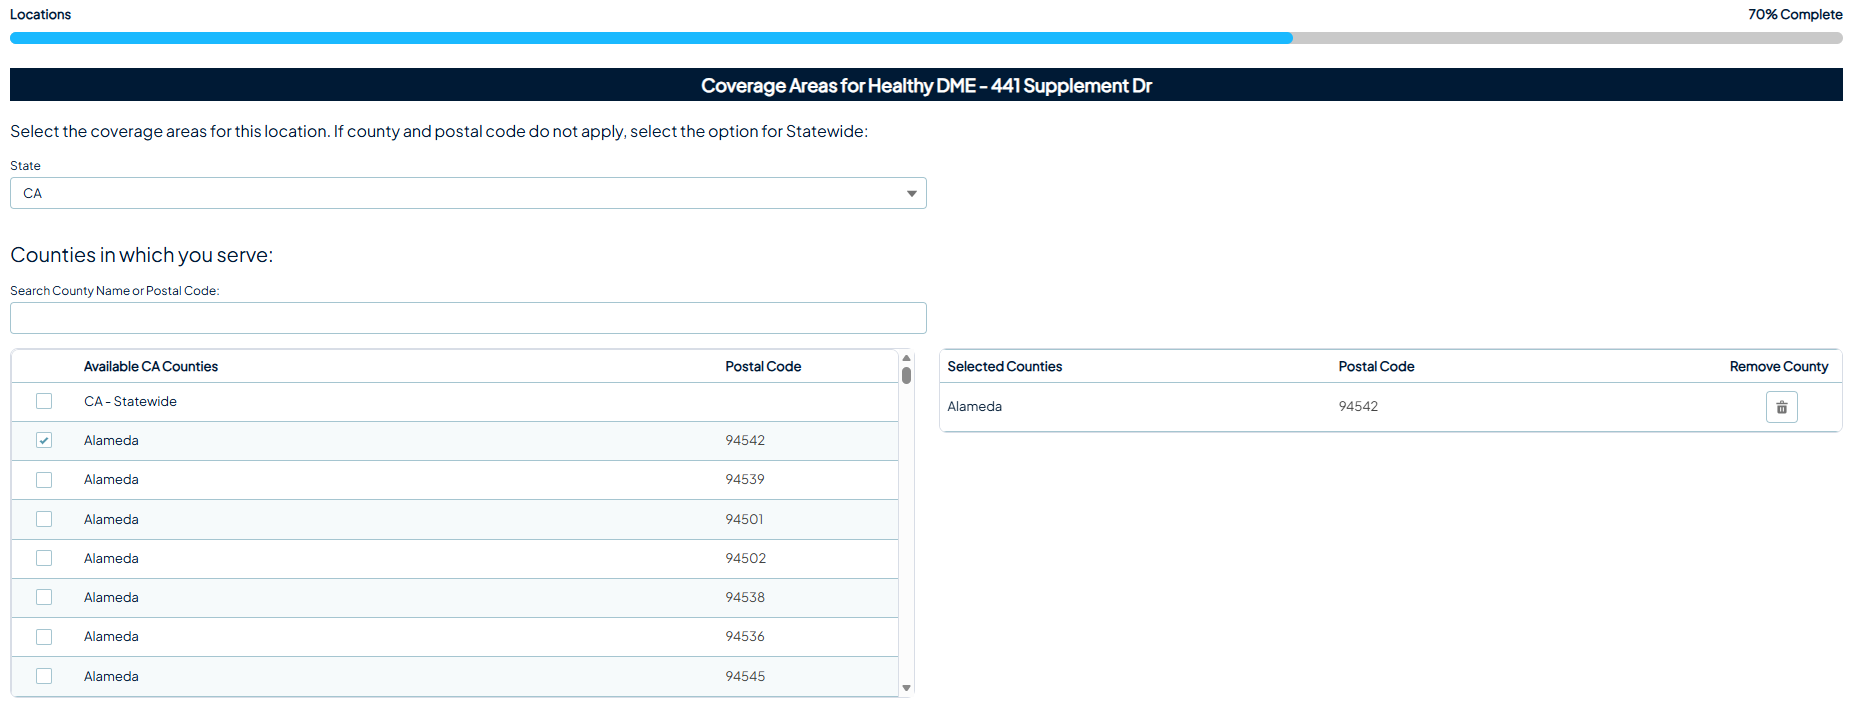
Coverage areas and licenses
- Only the counties you select appear in the table on the right.
- To remove a county, select the trash can under Remove county.
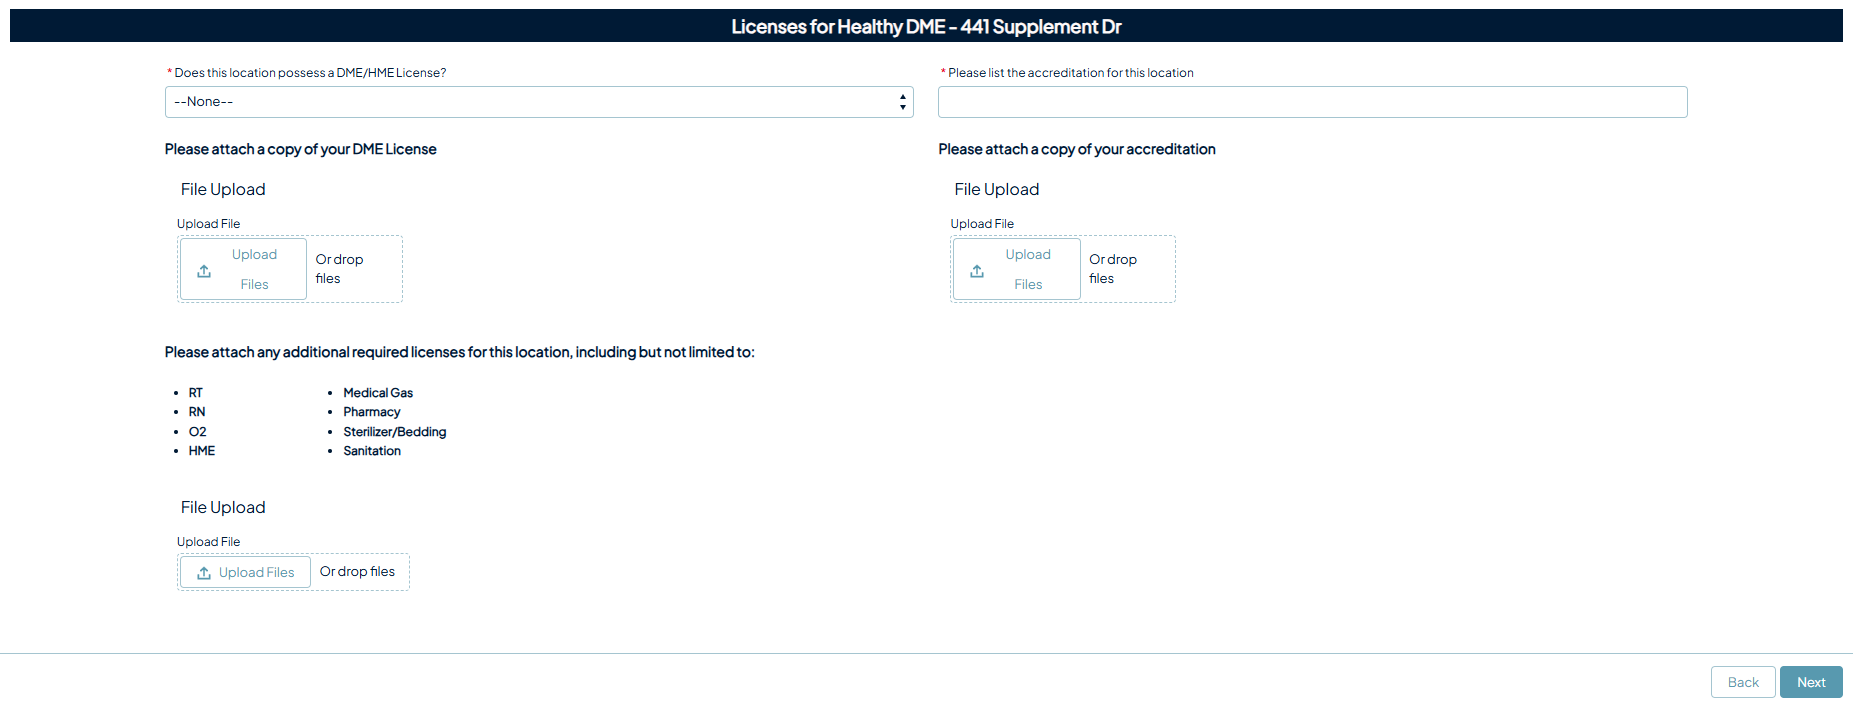
- You can upload multiple license files.
- Selecting Next returns you to the existing locations table.
Add or edit as many locations as you need. You always return to the locations table. When you are finished, leave every checkbox clear and select Next to move on.
Disclosures and attestation
The form is complete when you answer the disclosure questions and attest. A confirmation page tells you Synapse has received your information.

After you submit
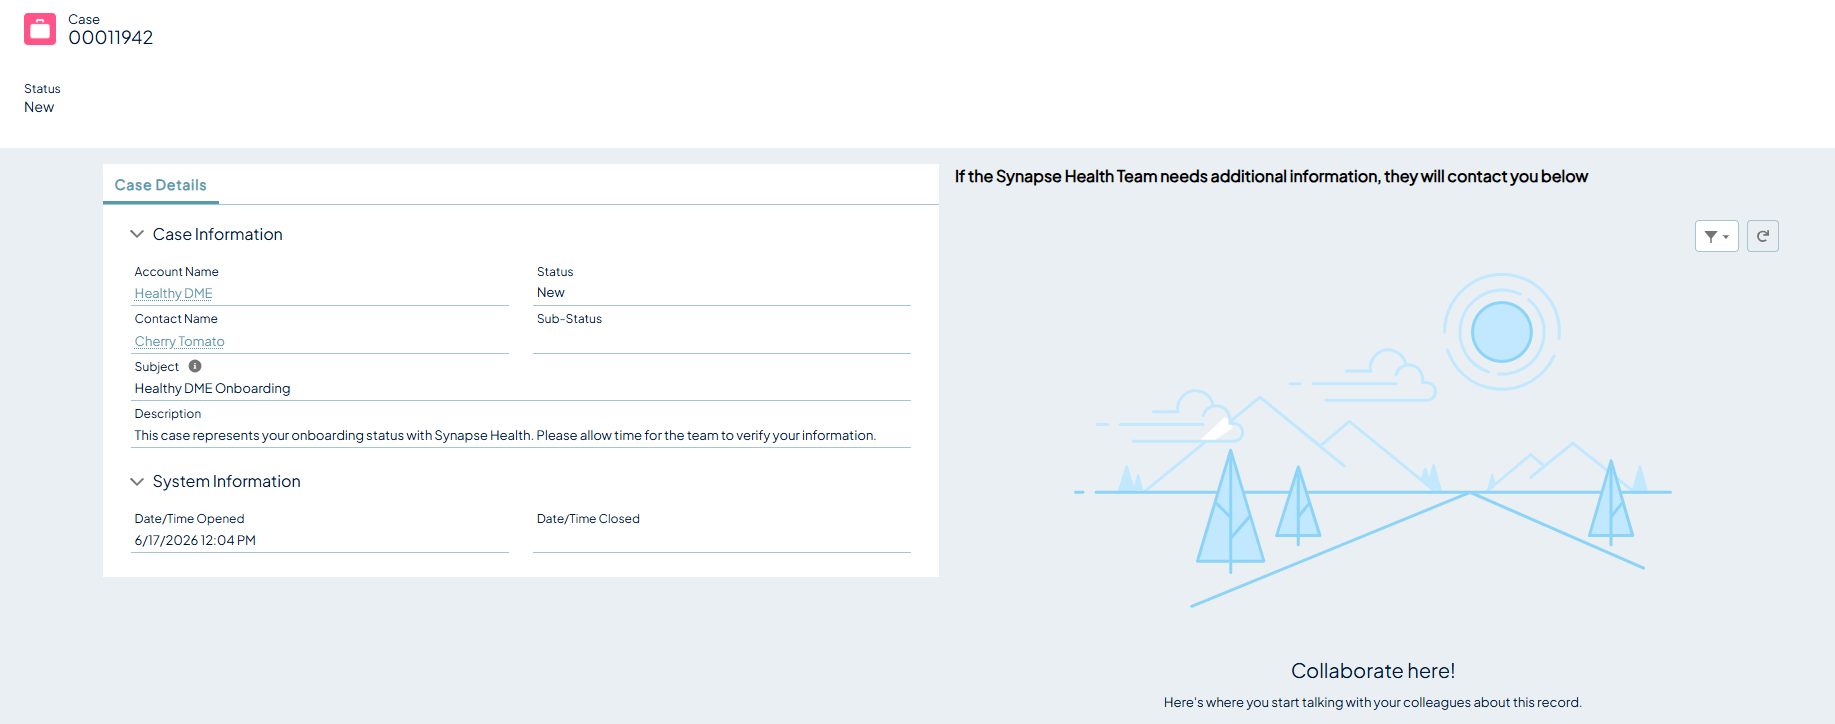
Your home page looks the same the next time you log in. What changes is what you see after selecting View: two new tabs.
| Tab | What it does |
|---|---|
| Account Information | Displays everything you submitted, and lets you make edits. |
| Cases | Shows the status of your onboarding. Select View for more detail. |

If you edit after submitting
- Edits can extend your onboarding – changes made during onboarding may increase how long it takes
- Finish the whole form – no matter how small the change, continue to the end so the Synapse team is notified
- Re-attest and submit – your edits are not reviewed until you have re-attested and selected submit
Messages about your onboarding
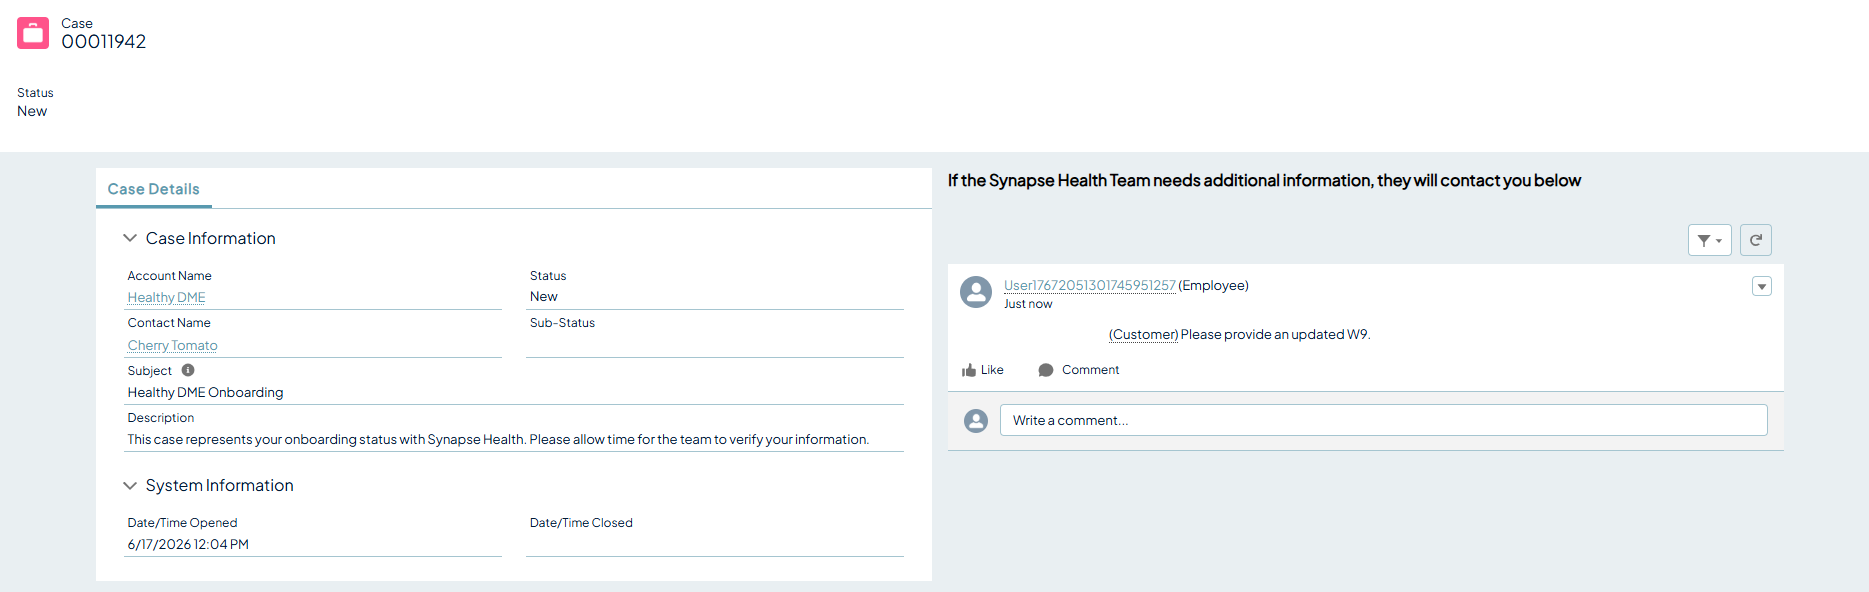
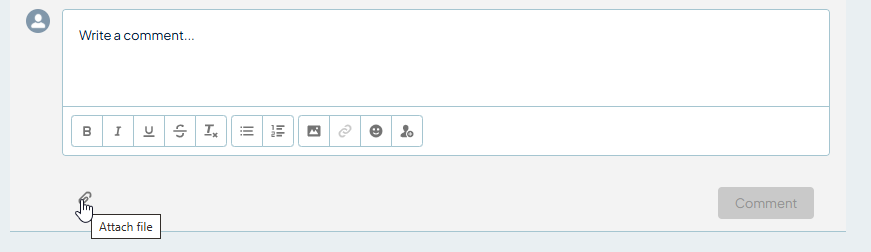
If the Synapse Health team needs to reach you about your onboarding, you will get an email. Any chat about your onboarding appears on the right side of the case. You can reply with a comment and attach a file.
Requesting changes you cannot make yourself
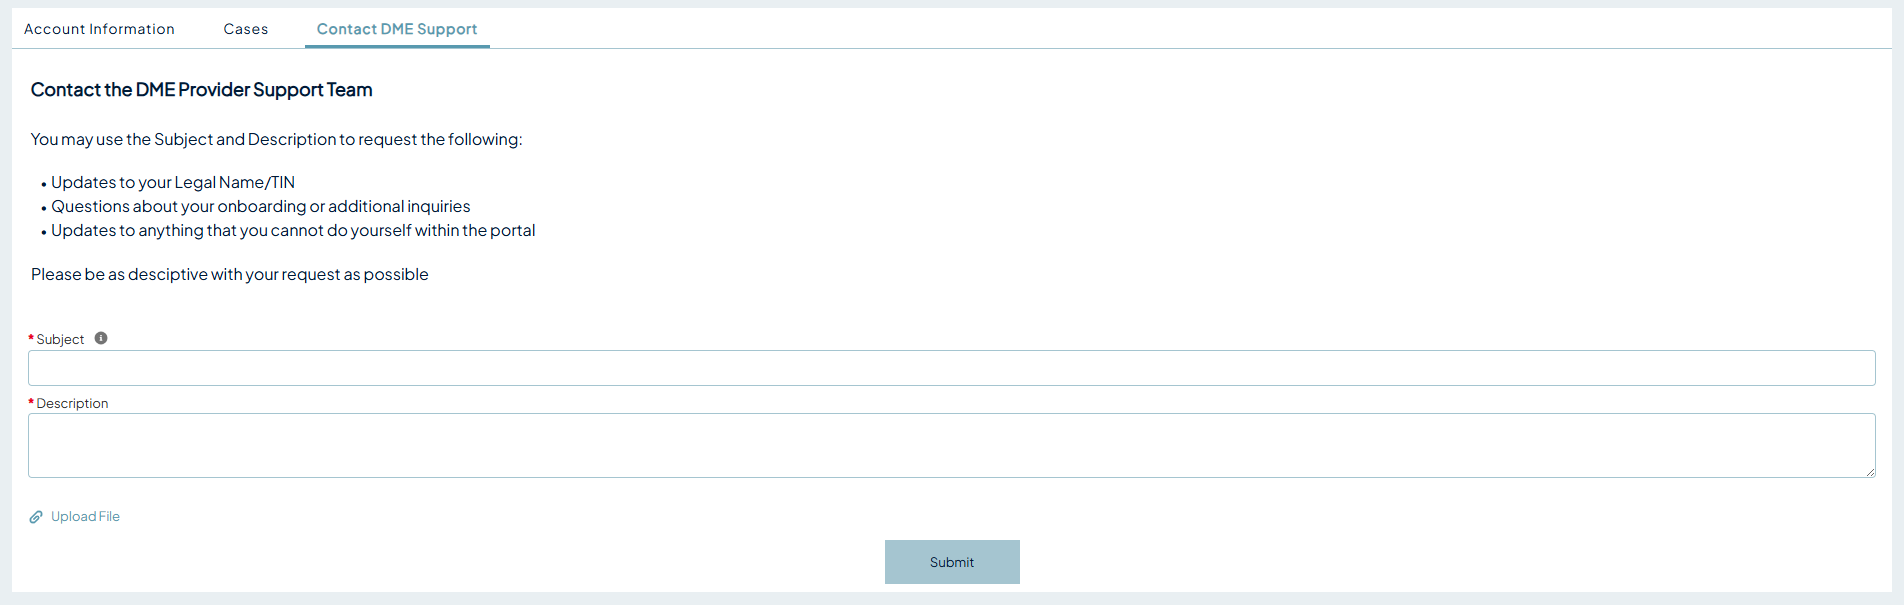
Use the Contact DME Support tab to request updates to data points you cannot edit directly, including your legal name and TIN, and to send any other question.
Gateway and credentialing support
-

Credentialing
credentialing@synapsehealth.com -
Implementation
implementationteam@synapsehealth.com -
DME provider support
1.888.801.9449

